Whenever you hear “tune-up Windows 10“, it is nothing new, really. A similar phrase that we’ve heard more than a couple of times – over and over.
For every Microsoft Windows operating system release, there will be issues in performance. Experts will always recommend users to tune up their operating system to maximize usage of the new OS.
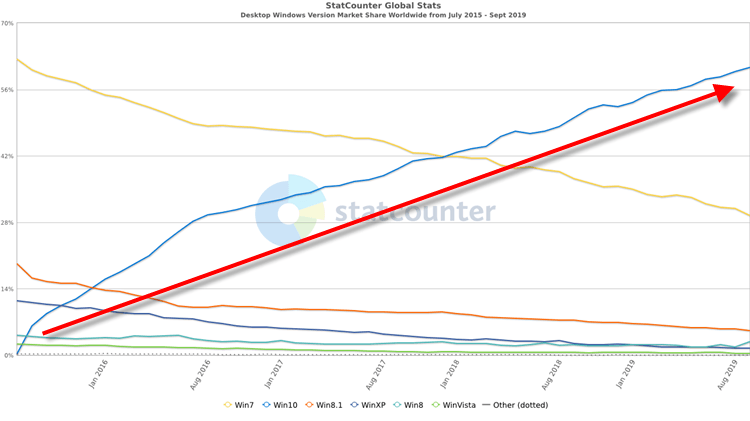
Microsoft Windows 10, is undeniably the most used Windows operating system since it was initially launched publicly in July 2015.
If you look at the graph below from GS Stat Counter, there are more and more users are into Windows 10 since July 2015. At the same time, Windows 7 users’ line is declining.
Now, if we want to be on the bandwagon, then we should know how we can optimize our Windows 10.
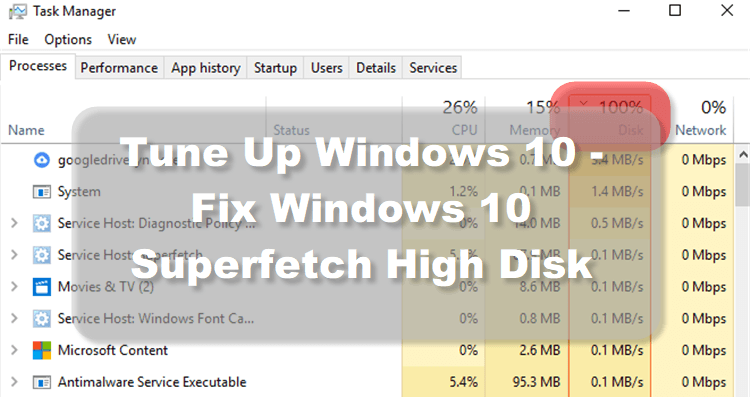
And let’s start with Windows 10 Superfectch which is consuming high disk usage. Superfetch is one of the top processes that make your disk usage reach 100%. And with the simple steps below, we can get around with this problem.
Page Contents
My Windows 10 Task Manager is Showing 100% Disk Usage
There’s a couple of reasons why your Windows 10 disk usage will hit 100% at some point. But there are ways to tune-up Windows 10 and mitigate the problem.
When your Windows 10’s disk usage hits 100% after looking at your Task Manager, here’s what you can quickly do.
- In your Task Manager, click the Processes tab (like in the image above);
- Sort the processes running by clicking the Disk column;
- Find out and list your top 10 running apps ;
You have to be very observant about step 3. The applications can and might deceive you. The behavior can be very fluctuating in most cases. So, you have to find the application that is consistently hitting the top 10.
In most cases, Windows 10’s Superfetch is one of the culprits.
What is Windows 10 Superfetch Anyway?
Some say Microsoft Windows Vista gave birth to Superfetch. Technically, yes. However, Superfetch was already a part of Windows even before Vista and it was called Prefetcher. Superfetch is the improved version of Prefetcher.
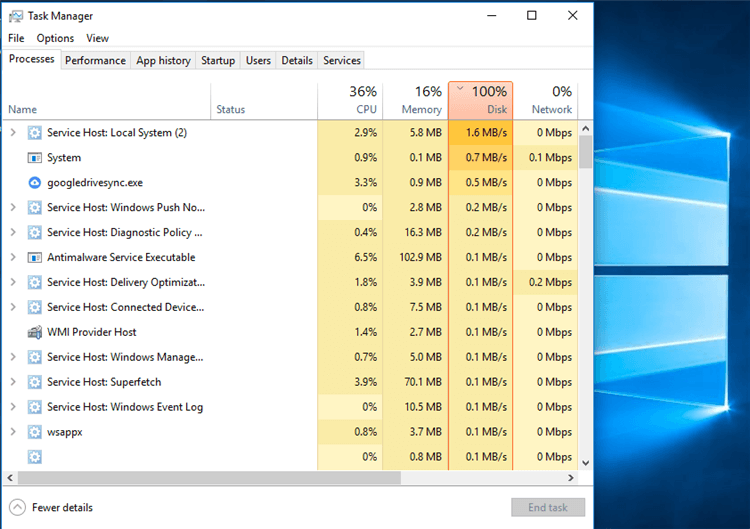
When you open your Windows Task Manager, you’ll easily identify which is the Superfetch process from the applications. It will be displayed as “Service Host: Superfetch“.
What does Prefetcher or Superfetch do in Windows?
Think Superfetch as artificial intelligence (AI), a small process running in your Windows 10 background. What it does is to monitor your most frequent software and loads it to your unused RAM (memory).

Superfetch studies the pattern on how and which program you use most of the time. Then Superfetch will sort these applications and does prioritization, marking the most used as “frequently used” software. Then it preloads the said applications into your machine’s RAM.
With this preloading method, it will help your program to load faster than it used to be. This process will make things easier and organized for you.
So, if Superfetch is preloaded in RAM, then why do I get 100% disk usage?
Indeed, Superfetch uses your unused RAM to preload the most frequently used software. And whenever you boot-up your machine, it is noticed that your disk usage hits 100%. Why is this so?
This is simply because your frequent software is being preloaded from your HDD (hard disk drive) into your RAM. That is why your Windows machine feels sluggish when you boot up.
If Superfetch is the culprit why my machine is sluggish, can I disable it?
Of course, you can! There’s no risk at all if you wish to disable Superfetch to tune-up Windows 10. Not even your data will be lost.
There were reports that Superfetch tends to affect Windows 10 users while heavily working with their machine.
It seems to happen if the application or software that you are using is constantly requesting and freeing up memory under a low RAM system. This is causing the Superfetch to load and unload data. And as a result, you will notice the slowness of your Windows 10 machine.
So yeah, if Superfetch is causing sluggishness and doing more problems than the other way – as it supposed to be. Then, by all means, disable Superfetch.
Three Ways How to Disable Superfetch To Tune-up Windows 10
There are 3 quick ways how you can disable Superfetch to tune-up Windows 10. Either way is not too technical. So, there’s no need to worry.
Disabling Windows 10 Superfetch Through Task Manager
Probably, this is the quickest way among the 3 ways that we will show you.
- Hover your mouse over your Windows taskbar;
- Press right-click and look for Task Manager;
- Click the Processes tab and look for Service Host: Superfetch;
- Collapse the process until you see Superfetch;
- Then, right-click the Superfetch process and click on Open Services;
- This will open the Services (Local) window;
- Scroll down to the services and look for Superfetch;
- Double-click Superfetch;
- Look for the Startup type option;
- Select Disabled;
- To complete the steps, click on either Apply or OK.
Disabling Windows 10 Superfetch Through Servicing App
Here’s another way of disabling Superfetch in Windows 10. Pretty much, the latter part steps are the same as with how it was done when accessing it from your Task Manager;
- From your keyboard, press your Windows + R simultaneously;
- Type services.msc and press enter;
- This will now open the Services (Local) window;
- Scroll down to the services and look for Superfetch;
- Double-click Superfetch;
- Look for the Startup type option;
- Select Disabled;
- To complete the steps, click on either Apply or OK.
Disabling Windows 10 Superfetch Through Registry Editor
Now, let’s get more technical but don’t worry because as promised, this step is also easy. We can also disable Superfetch through Windows 10 Registry editor.
- From your keyboard, press your Windows + R simultaneously;
- Type regedit and then press enter;
- Windows User Access Control will ask you if you want to open the Registry Editor, just click Yes;
- This will now invoke or open your Registry Editor window;
- Navigate through this by collapsing each one until you see EnableSuperfetch: HKEY_LOCAL_MACHINE > SYSTEM > CurrentControlSet > Control > Session Manager > MemoryManagement > PrefetchParameters > EnableSuperfetch
- Double click EnableSuperfecth;
- Change the Value data from the original to 0 (zero);
- Press OK – and that’s it!
Basically, that’s it! The next time you reboot your Windows 10 PC desktop or laptop, it will not trigger the Superfetch process anymore.
And to enable the Superfetch, well, just do the same thing again. But this time, use the opposite or original values. It is recommended that you make it a habit to backup before doing any changes.
You can watch the video below for the visual steps on how to disable Windows 10 Superfetch using any of the steps above.
