You can prevent losing data or files even if you accidentally deleted them. Or even you did it intentionally. And the good thing about this method is you don’t need to buy any third-party software to do it.
However, to prevent losing data, it can only be done on Windows 8 and above.
I can show you the steps on Windows 10 but the procedure is generic. This means you can activate the File History feature using the same steps below.
But you can still do the old-school backup method using any reliable external drive. Or you can even utilize third-party cloud services such as One Drive, Dropbox, Google Drive, etc. There are different choices to prevent losing data where you can backup your files.
As I’ve mentioned, there is a built-in feature from Windows 8 or Windows 10 and/or above to backup and restore your data files.
You just need to activate the File History feature then you can prevent losing data even if you have accidentally deleted a file. Let us start.
Page Contents
How To Activate File History On Windows 8.1 To Back-up Files
The steps here below on how to back-up your files are applicable for Windows 8 and Windows 8.1.
1. Plug your External Drive. It is recommended to use an external drive or network drive before you can start to use File History.
The simplest explanation for this is because you will have the option to restore your files in case of a total crash of your internal hard drive.
So, if you don’t have an external drive then there is no point to continue.
2. Go to File History from your Control Panel.
If you are unable to find it, either use the Search option and type “File History” or you can open your Windows File Explorer then copy and paste “Control Panel\System and Security\File History“.

3. By default, File History will try to scan your machine for any attached external drive.
If it fails to detect your drive, then you have to manually select and assign where you want to save or create the backup.
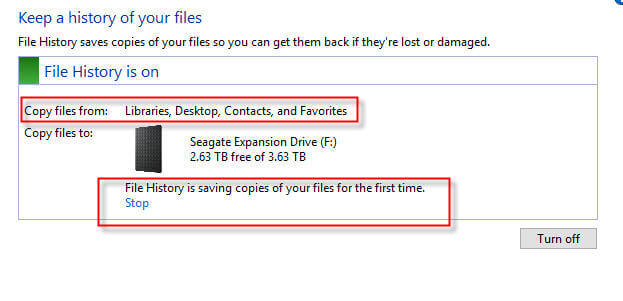
4. And another default settings, File History is turned off. So from this step, you just need to hit the Turn On button.

5. It might ask you if you want to recommend the attached drive to other users of the same machine, just click the Yes button.
6. Then you will notice that File History will start saving important directories for the first time – just leave it for a while. Go get yourself a cup of coffee. 🙂
The caveat of File History in Windows 8 and Windows 8.1
So far, there’s one caveat when using File History for Windows 8 and Windows 8.1. You cannot add more folders to backup and your only option is to exclude folders/Libraries.
The default File History that can backup on Windows 8 or Windows 8.1 is Libraries, Desktop, Contacts, and Favorites.
The only workaround is to modify or create your own custom Libraries which I will tackle in a separate tutorial.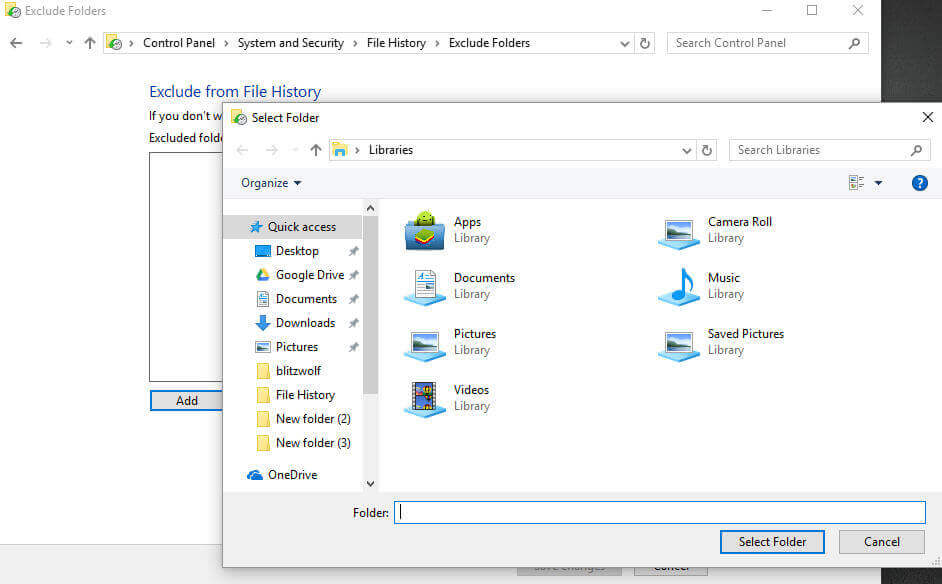
Restore Backup Files from File History On Windows 8 and Windows 8.1
Over time, all of your files in the Documents, Music, Pictures, Videos, and Desktop folders and the OneDrive will be synced in File History (based on your versioning settings).
With the backup files you have, you can now have that feeling of assurance that whatever happens, you have a working backup of your files.
Whether your file gets corrupted or gets deleted (accidentally or intentionally), you will have something to restore.
1. Like the first step above, attach your external drive where you saved your backup files from File History. Then use the Search option of Windows 8 or Windows 8.1.
2. In the search box, type and search for “Restore your files with File History” – then press your Enter key.
3. Once it is loaded, search for the file you want to restore by selecting from the different versions of your folders and files.
4. Once you have decided to select which one to restore to its original location, just hit the Restore button.
But if you want to restore the file into a different location or directory, right-click the Restore button. Select the Restore To then it is up to you now to select where you want to restore your backup files.
How To Backup Files in Windows 10 with File History
File History has evolved in Windows 10 and it has a new face called “Backup Settings“.
Based on my observation, even though it has a new name with new flexible options, the backend of this feature still uses File History.
You will notice on some of the features of File History is still there and even the options are there.
There are just more additional options like you can now add folders to backup and you no longer need to create custom Libraries unlike with Windows 8 or Windows 8.1.
The steps are pretty much the same as Windows 10 and the pre-requisite are the same where you need an external drive to be able to backup periodically your files.
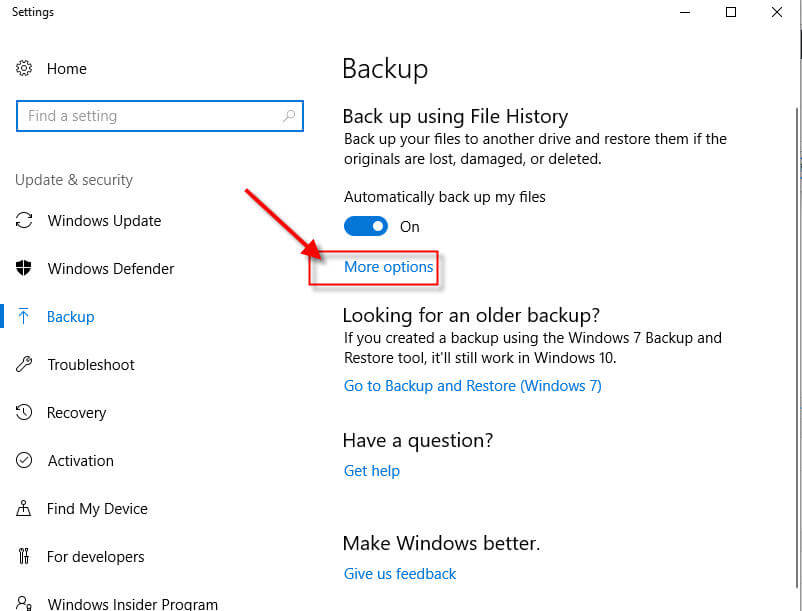
1. Attach your External Drive and then use the Windows 10 Search option. Type find, and select Backup Settings.
2. Then toggle to turn on or activate the Back up using File History.

3. Then click on More Options to see more configurations. From here, you can set the scheduling period and retention plan of your backup, and also you can add more folders to backup – the joy of it!

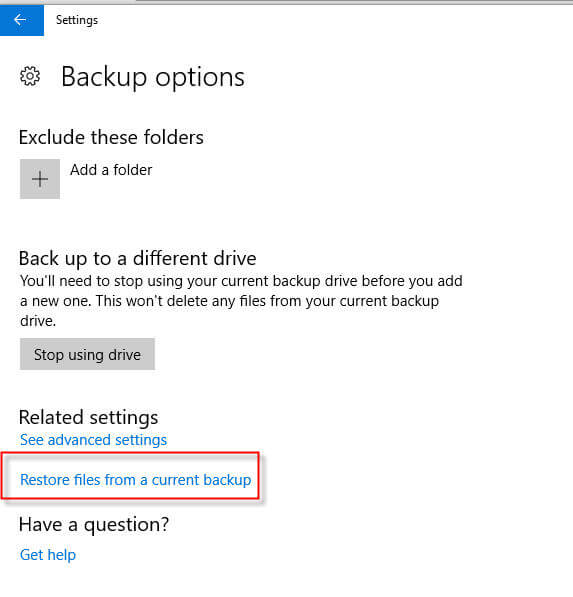
4. You can also use Exclude these folders as an option to select which folders you don’t want to backup if you scroll down.
Restoring Backup Files from Windows 10 Backup File History Settings
The steps to restore files from Windows 10 File History Backup Options are pretty much the same with Windows 8 and Windows 8.1.
The only difference is you no longer need to go away from the Backup Options menu.
1. From the Backup settings, under the Back up using File History click More options.
2. Then in the Backup Options, scroll down until you see the option Restore files from a current backup.
3. Then like the File History restoration option from Windows 8 and Windows 8.1, just search for the files you want to restore and click the Restore button.
In Summary, why do you need to create a backup?
Make it a habit of creating a fresh backup periodically – make it a must thing!
Because if you have not noticed lately it is not only yourself or other users of your desktop or laptop machines who could compromise your important files.
There are also other factors now especially once you hook your machine into the Internet.
There is now so-called Ransomware like the recent WannaCrypt and Petya which can do serious damage to your data – they will literally block your access to your files unless you pay i.e. Bitcoin cryptocurrency.
So be aware and be wise!
For Mac users, here is our article on how to backup to an external drive and restore it.